
You will need...
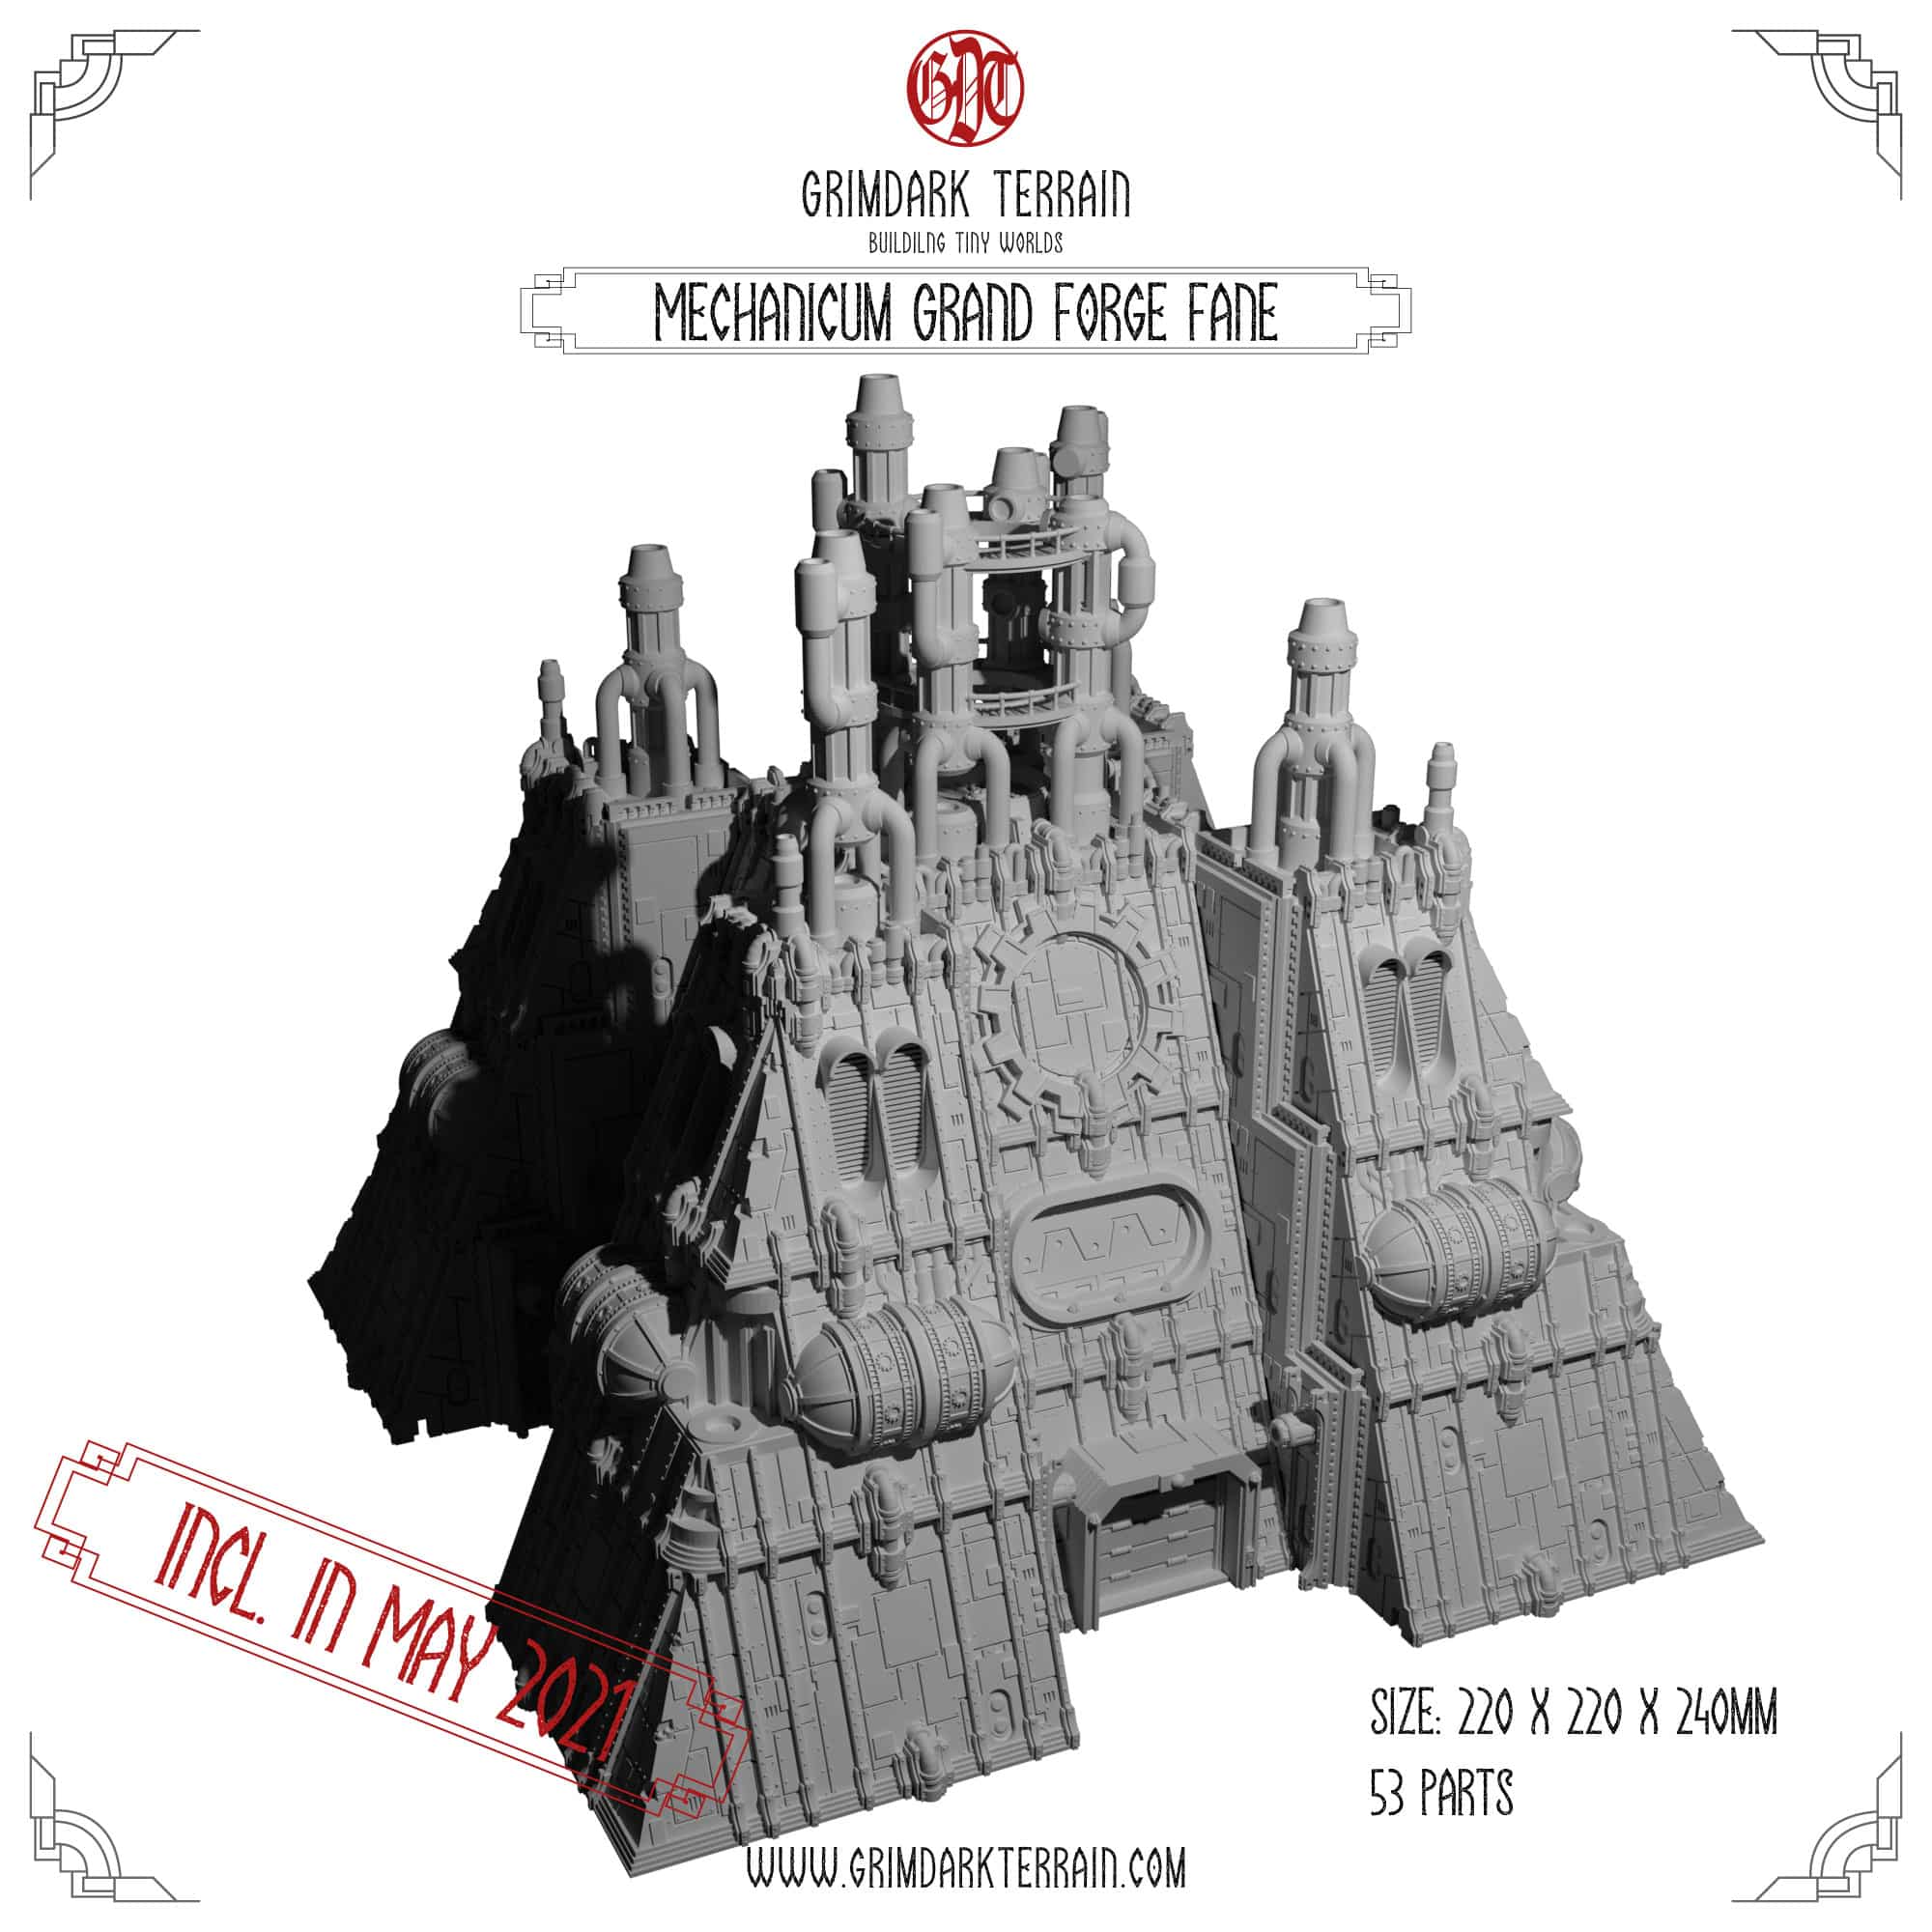
This is our first post of the Series “Template Construct”, where we will show what’s possible with the current month’s package. This post (and the instructions) feature a build that is entirely made with our May 2021 Package, which includes all parts for building a Grand Forge Fane.
Be warned: the Grand Forge Fane is a massive kit and it makes a great centre piece. However, you might print a few days in order to get all the parts ready.
Print Order
In order to build the Grand Forge Fane as shown in the renders, you will need to print a total of 45 parts. The parts needed are:
- 4x Olympus Mons – FF Base Wall Recessed Gate (OM-025)
- 4x Olympus Mons – FF Base Wall Corner (OM-012)
- 12x Olympus Mons – FF Base Wall (all versions possible OM-004, OM-005, OM-006 )
- 4x Olympus Mons – FF Corner Emplacement (OM-025 or )
- 4x Olympus Mons – 1×1 Top Chimneys (version 1, 2 or 3 // OM-019, OM-020, OM-021)
- 4x Olympus Mons – FF Top Corner (OM-010)
- 4x Olympus Mons – Recessed Side Wall L (OM-015)
- 4x Olympus Mons – Recessed Side Wall R (OM-016)
- 4x Olympus Mons – Top Chimney Corner 1 (OM-014)
- 1x Olympus Mons – 2×2 Top Chimneys 1 (OM-022)
Note: You will need a total of 12 FF Base Walls, which come in various different flavours. It doesn’t really matter, which one you choose, because they all have the same measurements. Personally, I prefer a mix of the less ornate ones for the outside walls and go for Drone Bay and Cog for the inside. That means, that you will need 8 ornate and 8 regular Base Walls.
You will need to print additional 4 parts for the corner emplacements. We recommend th OM-013 Choom Gun for the Forge Fane. But other 5mm emplacements will just work fine.
Assembly
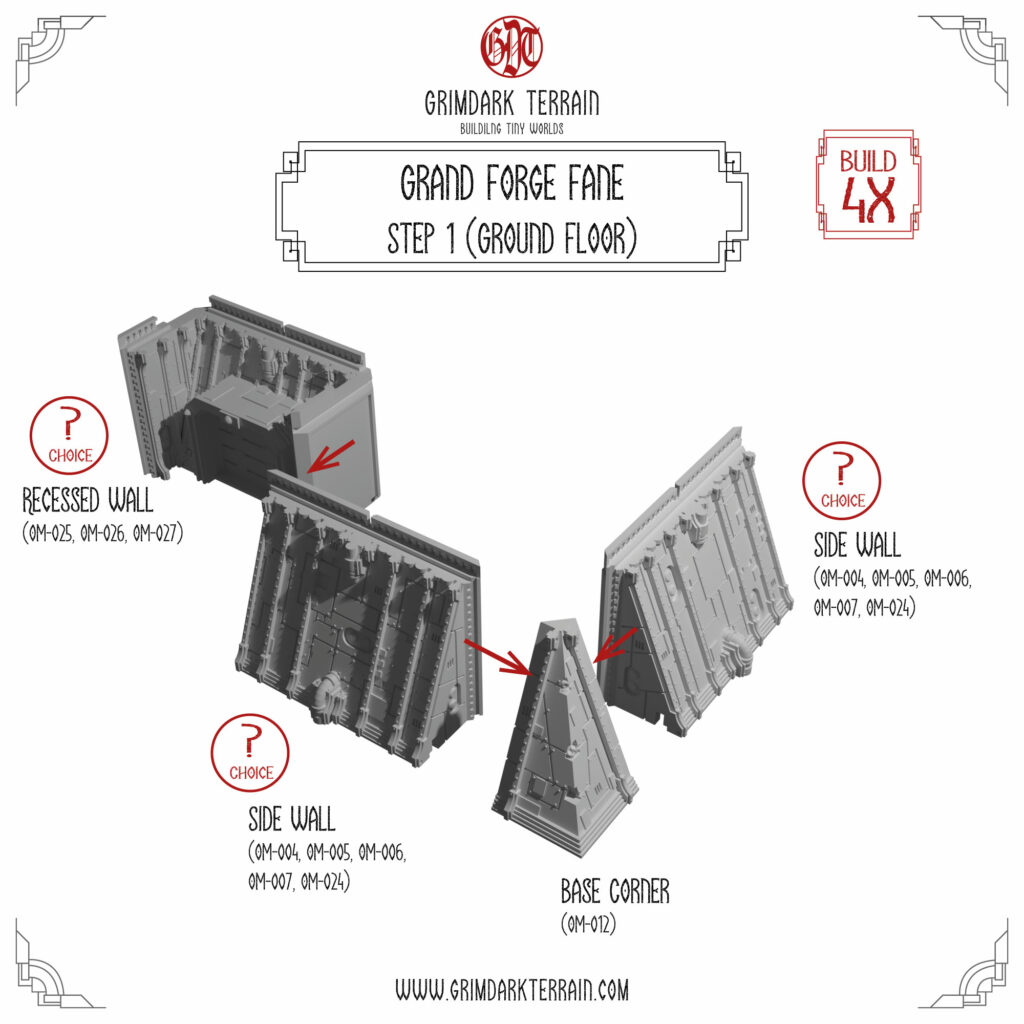
The Ground Floor
In order to build the Grand Forge Fane, you will need to print a total of 56 parts. The parts needed are:
- 4x Olympus Mons – FF Base Wall Recessed Gate
- 4x Olympus Mons – FF Base Wall Corner
- 8x Olympus Mons – FF Base Wall (Version 1, 2 or 3)
The first step will have you build the 4 courners of the ground floor as indicated in the picture.
Once you build all 4 corners do a dry fit of all the corners and check angles. With the current technology even on larger and more expensive machiens, there is slight warpage when printing in 3D. However, since the Grand Forge Fane is a fairly large build you want to make sure that you have the angles right.
We recommend to have the parts for the second floor ready and include in the dry fit.

2nd Floor
To build the second floor, you will need to print a total of 56 parts. The parts needed are:
- 4x Olympus Mons – FF Corner Emplacement (choice: version 1 or 2 // OM-009 or OM-008)
- 4x Olympus Mons – Recessed Cog or Recessed Drone Bay (OM-026 or OM-027)
- 4x Guns or Emplacements (Renders schow Choom Gun Emplacement OM-013) [or other emplacements]
Note: Make sure you clean out the recessess on the bottom of the corner parts before glueing or dry fitting. Dont glue the guns or tech emplacements before you painted the model.
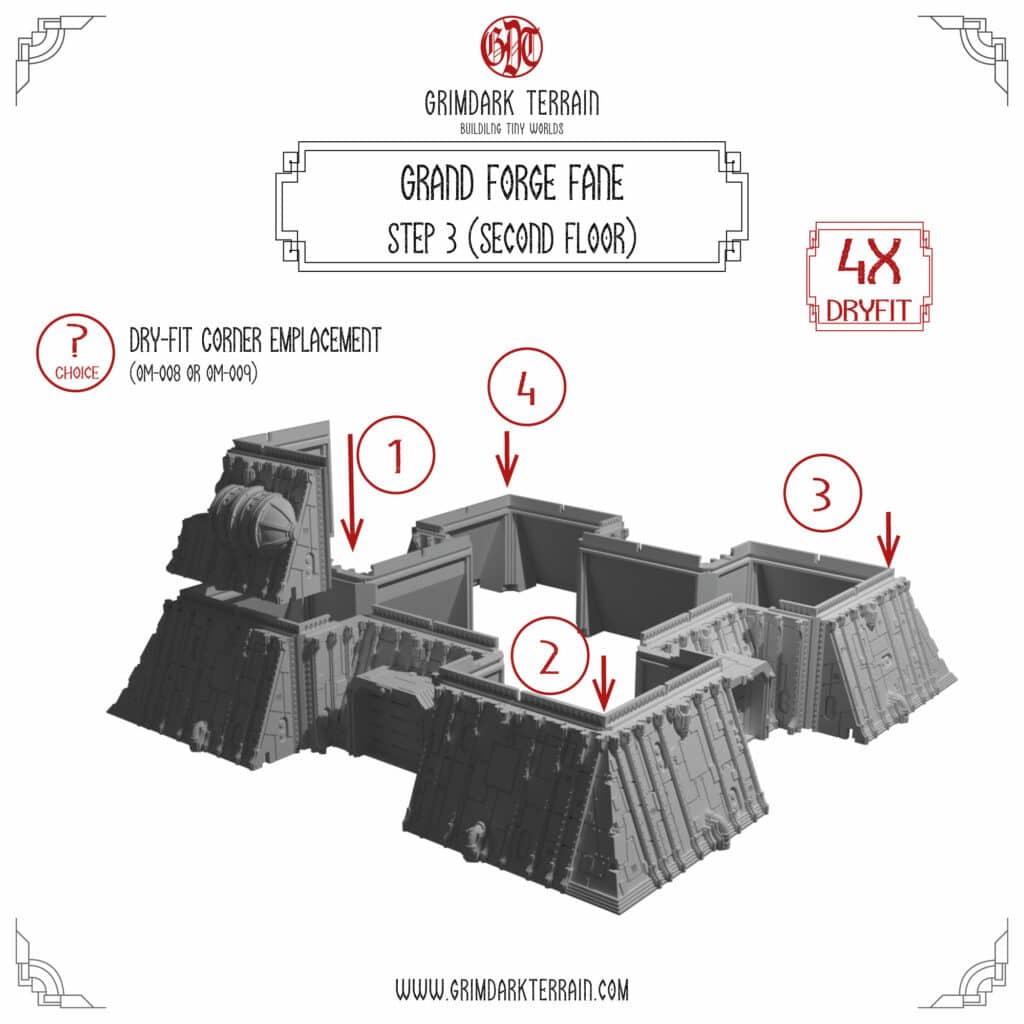
Remember to dry fit everything before glueing in place (because of potential warpage). GDT designs all pieces with enough tolerance for a medium bleed. However, it can be that your settings or your resin deviates a little bit from those tolerances. In that case you will have to scrape out the grooves on the bottom of all corners parts with a knife, until they fit the ground floor.

3rd Flor
The last step need the most parts and the most work: to build the third floor, you will need to print a total of 25 parts. The parts needed are:
- 4x Olympus Mons – FF Base Wall (all versions possible OM-004, OM-005, OM-006 )
- 4x Olympus Mons – 1×1 Top Chimneys (version 1, 2 or 3 // OM-019, OM-020, OM-021)
- 4x Olympus Mons – FF Top Corner (OM-010)
- 4x Olympus Mons – Recessed Side Wall L (OM-015)
- 4x Olympus Mons – Recessed Side Wall R (OM-016)
- 1x Olympus Mons – 2×2 Top Chimneys 1 (OM-022)
Note: Make sure you clean out the recessess on the bottom of the corner parts before glueing or dry fitting.
In case you fancy the more ornate version of the Forge Fanes you may print an additional 4 parts and add those to the top centre:
- 4x Olympus Mons – Cog Wall Topping (from April’s Package)
- 4x Olympus Mons – Top Chimney Corner 1 (OM-014)
Please remember that those latter parts are not integral but just cosmetic additions.
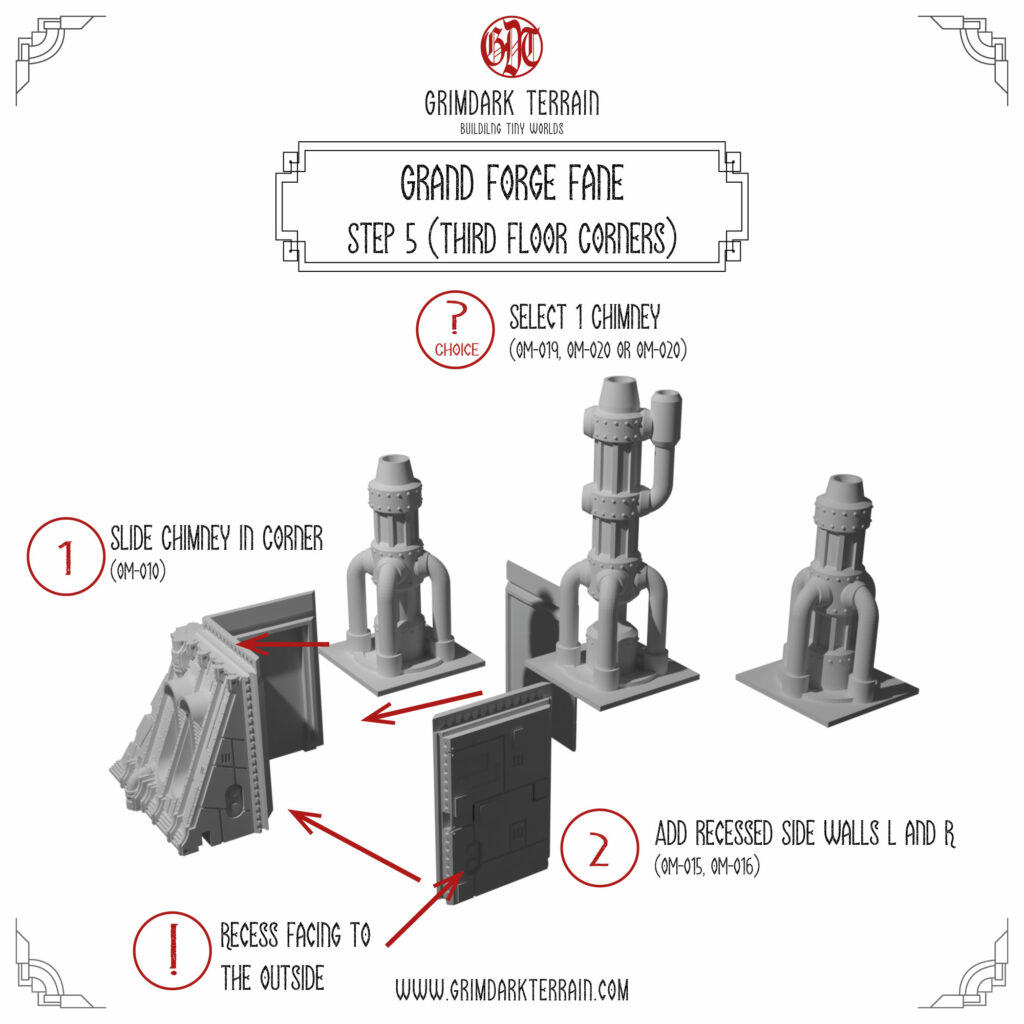
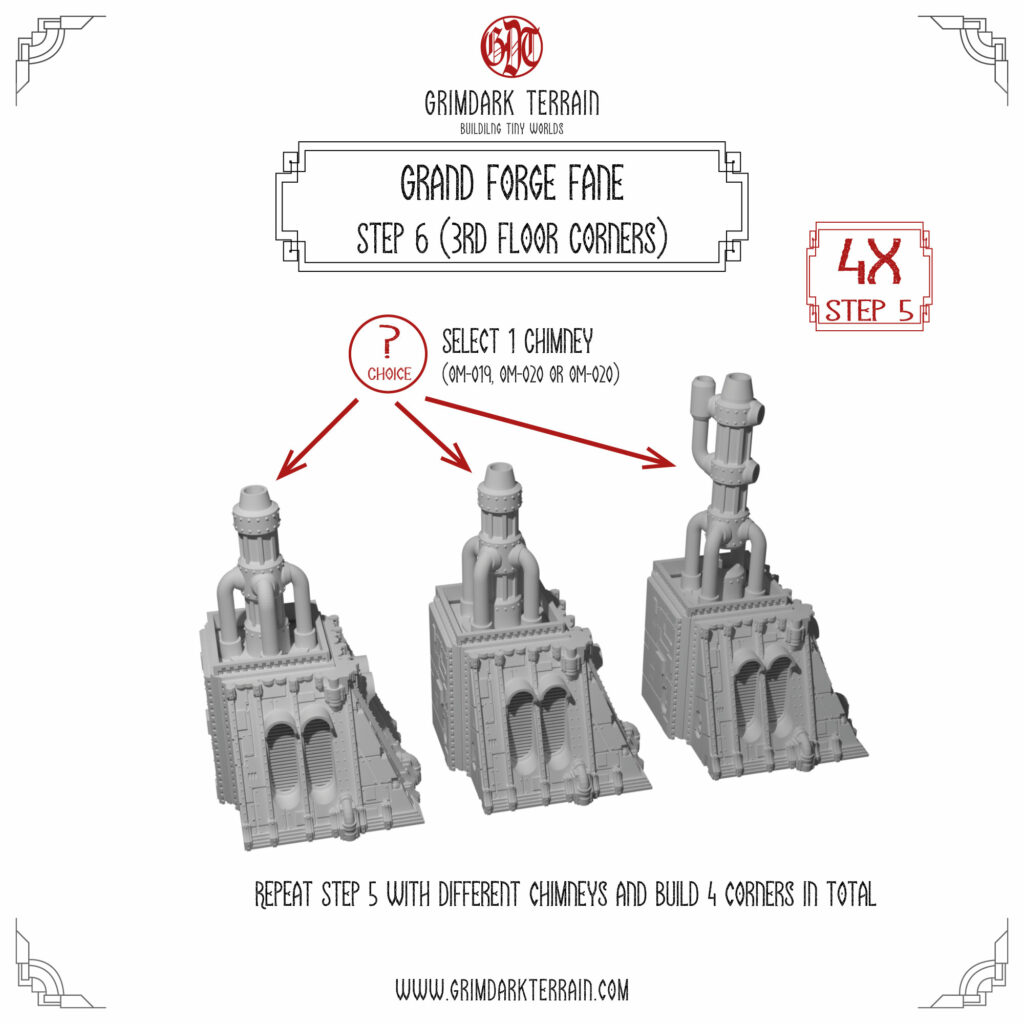
Step 5 and Step 6 give you some choices. Pictured in the renders are the 1×1 Top Chimneys OM-019, OM-020 and OM-021. But any other 1×1 topping part will serve the same function.
You will need the corner built in Step 5 for every of the four corners of the fane.
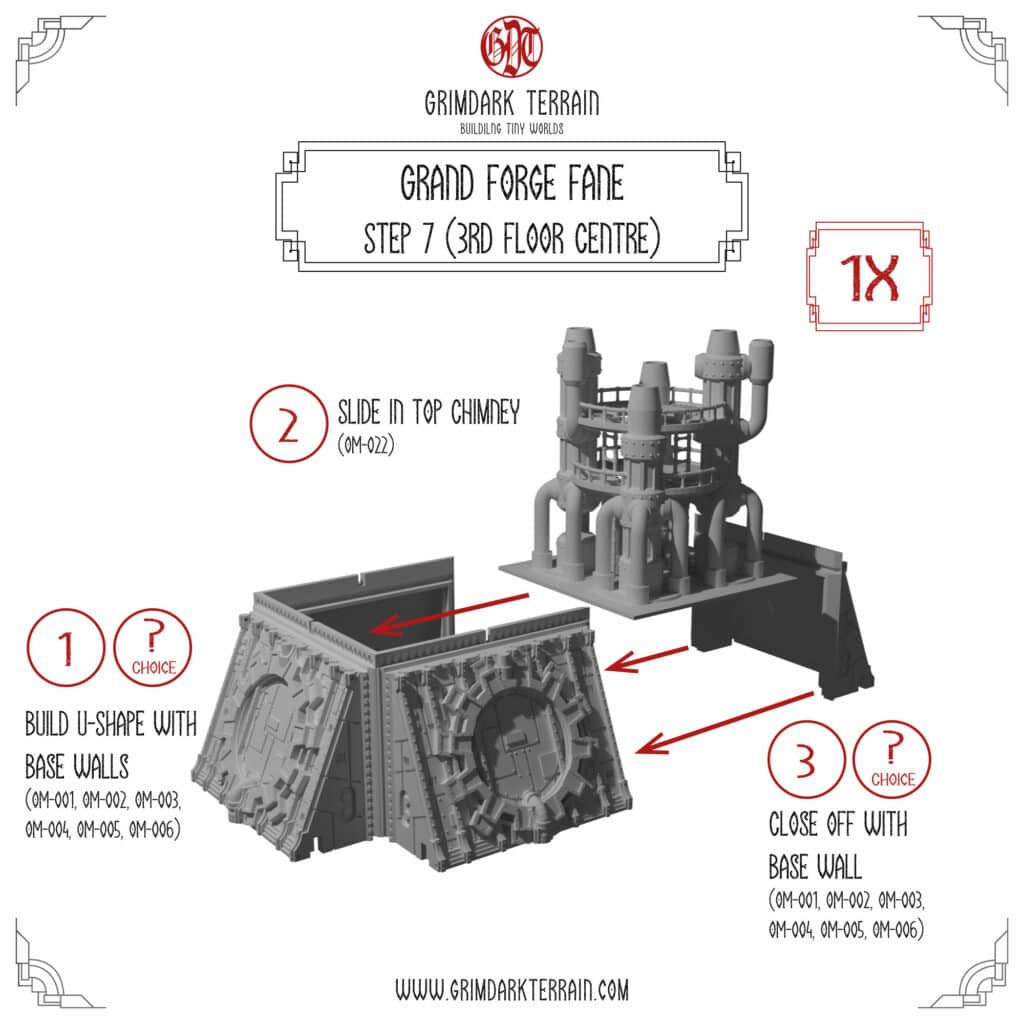
The render of Step 7 shows the OM-001 Cog Base Wall as the sides of the 3rd floor centre piece. Please note, that any part from OM-001 to OM-006 will serve the purpose and it is up to you to decide, which one you’d select.
Same goes for the 2×2 Top Chimneys OM-022. Any other (future) 2×2 part will do just fine. Maybe add a Missle Silo on the top of the Forge Fane? 😀
Step 8 requires you to dry fitt all the parts from Steps 5-7 on the top of the fane. Be sure you clean out all the bottom recesses and swap positions around a bit. It it often the case that some corners fit better in certain places. Once you found a good combination you can glue all the pieces in place.

Step 9 is simply the glueing and you will be done with the Grand Forge Fane. Now for some cosmetic upgrades.

Upgrades
You can easily upgrade any Forge Fane with the Top Edge Upgrades like the
- Top Corner Chimneys (OM-014 ) for the top corners and
- Pipe upgrades from previous packages or the Cog Upgrades
With regards to the emplacements, you can slot in any 5mm emplacement part. However, the OM-013 Choom Gun looks best 😛
I can’t begin to express how thankful I am that you are creating build instructions for more complex ’kits’. This is so very helpful. Thank you very much.
My pleasure 🙂
Giddy…just reading through this and getting the build manifest together for construction makes me feel like the first LEGO set I bought when I was 10. Wow. Thank you so much!
Love the instructions! I’m having trouble getting the stls download – just that one Olympus Mons May zip. I haven’t had problems with any other files…