For the Samson Freighter you will need...
In this post of the Series “Template Construct”, where we will show you how to build the Samson Freighter from July 2021’s package, which includes all parts for building the freighter and an entire Aeolus Airfield.
Be warned: the Samson is a massive kit and is about 18cm long, 11cm wide and 5.5cm tall.
For building this kit you will need all printed parts liste below, a scalpel, pincers, sanding paper and super glue. Depending on your printer’s settings and generation, you might experience some warping round the edges or larger gaps than design. You can fix these with putty or by sanding it to fit.
In case you want to magnetise the cargo, you will need a total of 12 magnets with 5mm diameter and 2mm thickness (6x for the cargo and 6x for the fuselage)
.
Part List
The Samson is grouped into three main parts / sub assemblies, that should be grouped when printing the kit. For each subassemply you will need the following parts:
The Bow
- AE-012 Samson Freighter – Bow (1x)
- AE-020 Samson Freighter – Cargo Bay Wall Bow (1x)
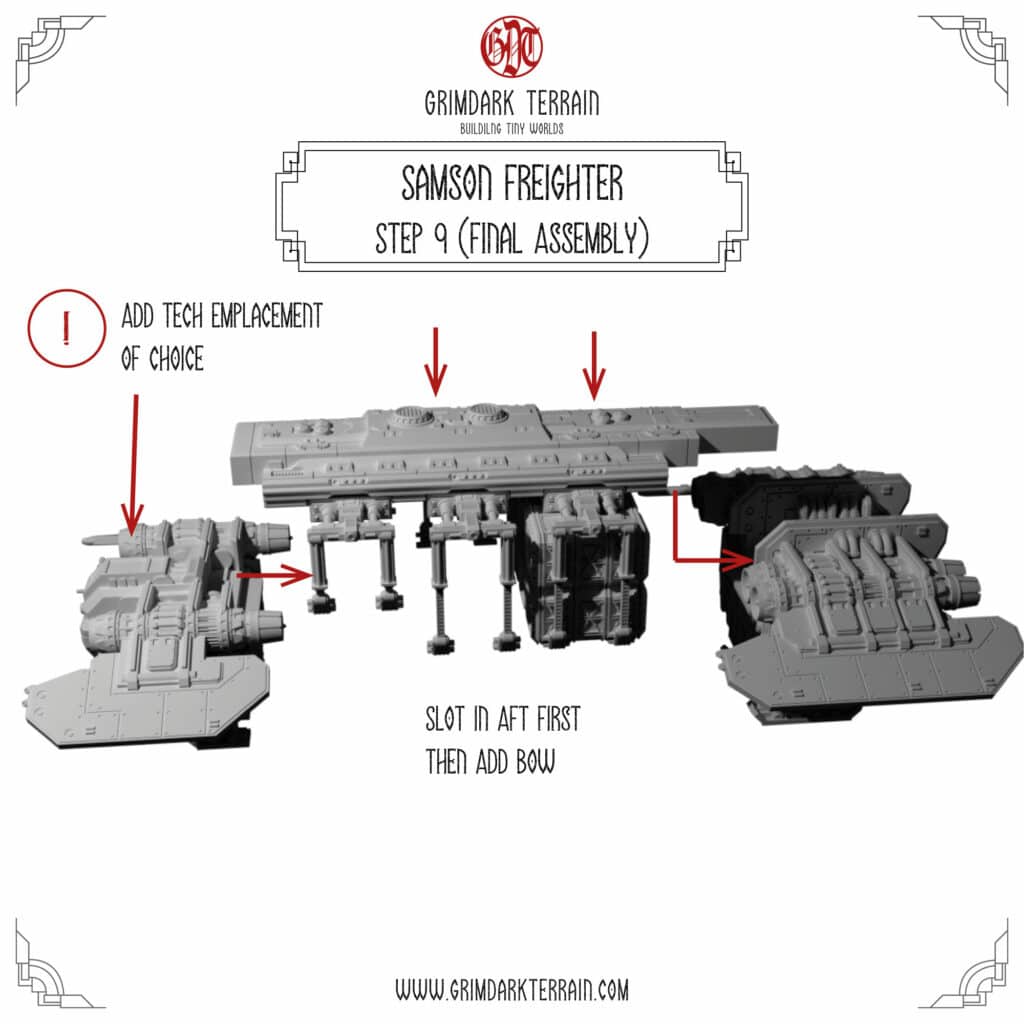
- Tech Emplacement of your Choice (1x)
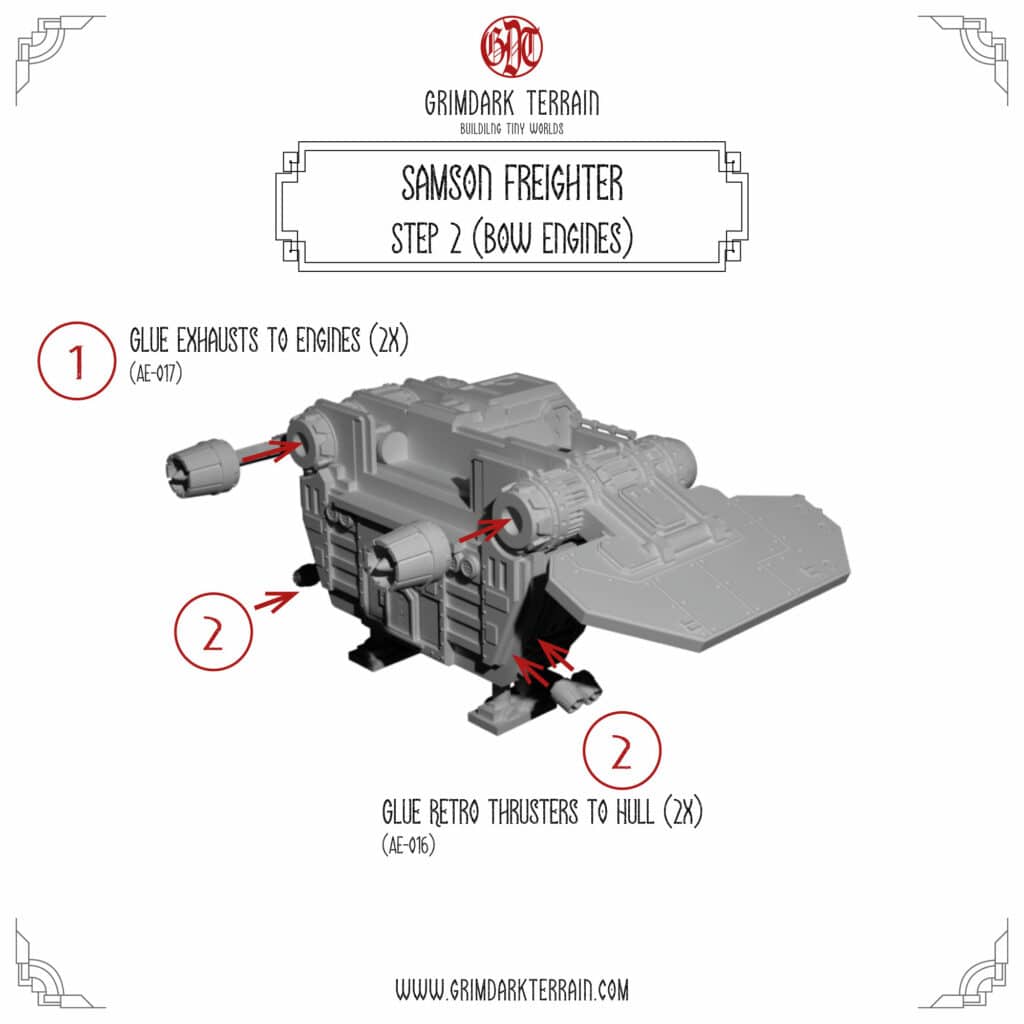
- AE-016 Samson Freighter – Retro Thrusters (2x)
- AE-017 Samson Freighter – Exhaust (2x)
The Aft
- AE-015 Samson Freighter Aft (1x)
- AE-018 Samson – Aft Wing L (1)
- AE-019 Samson – Aft Wing R (1)
- AE-016 Samson Freighter – Retro Thrusters (4x)
- AE-017 Samson Freighter – Exhaust (4x)
- AE-021 Samson Freighter – Cargo Bay Wall Aft (1x)
The Fuselage and Cargo
- AE-013 Samson Freighter – Fuselage (1x)
And a total of three Cargo Bay parts, for example:
- AE-023 Samson Freighter – Empty Clamp Retracted
- AE-022 Container Clamp Extended
- AE-014 Samson Freighter – Cargo Containers
Assembly
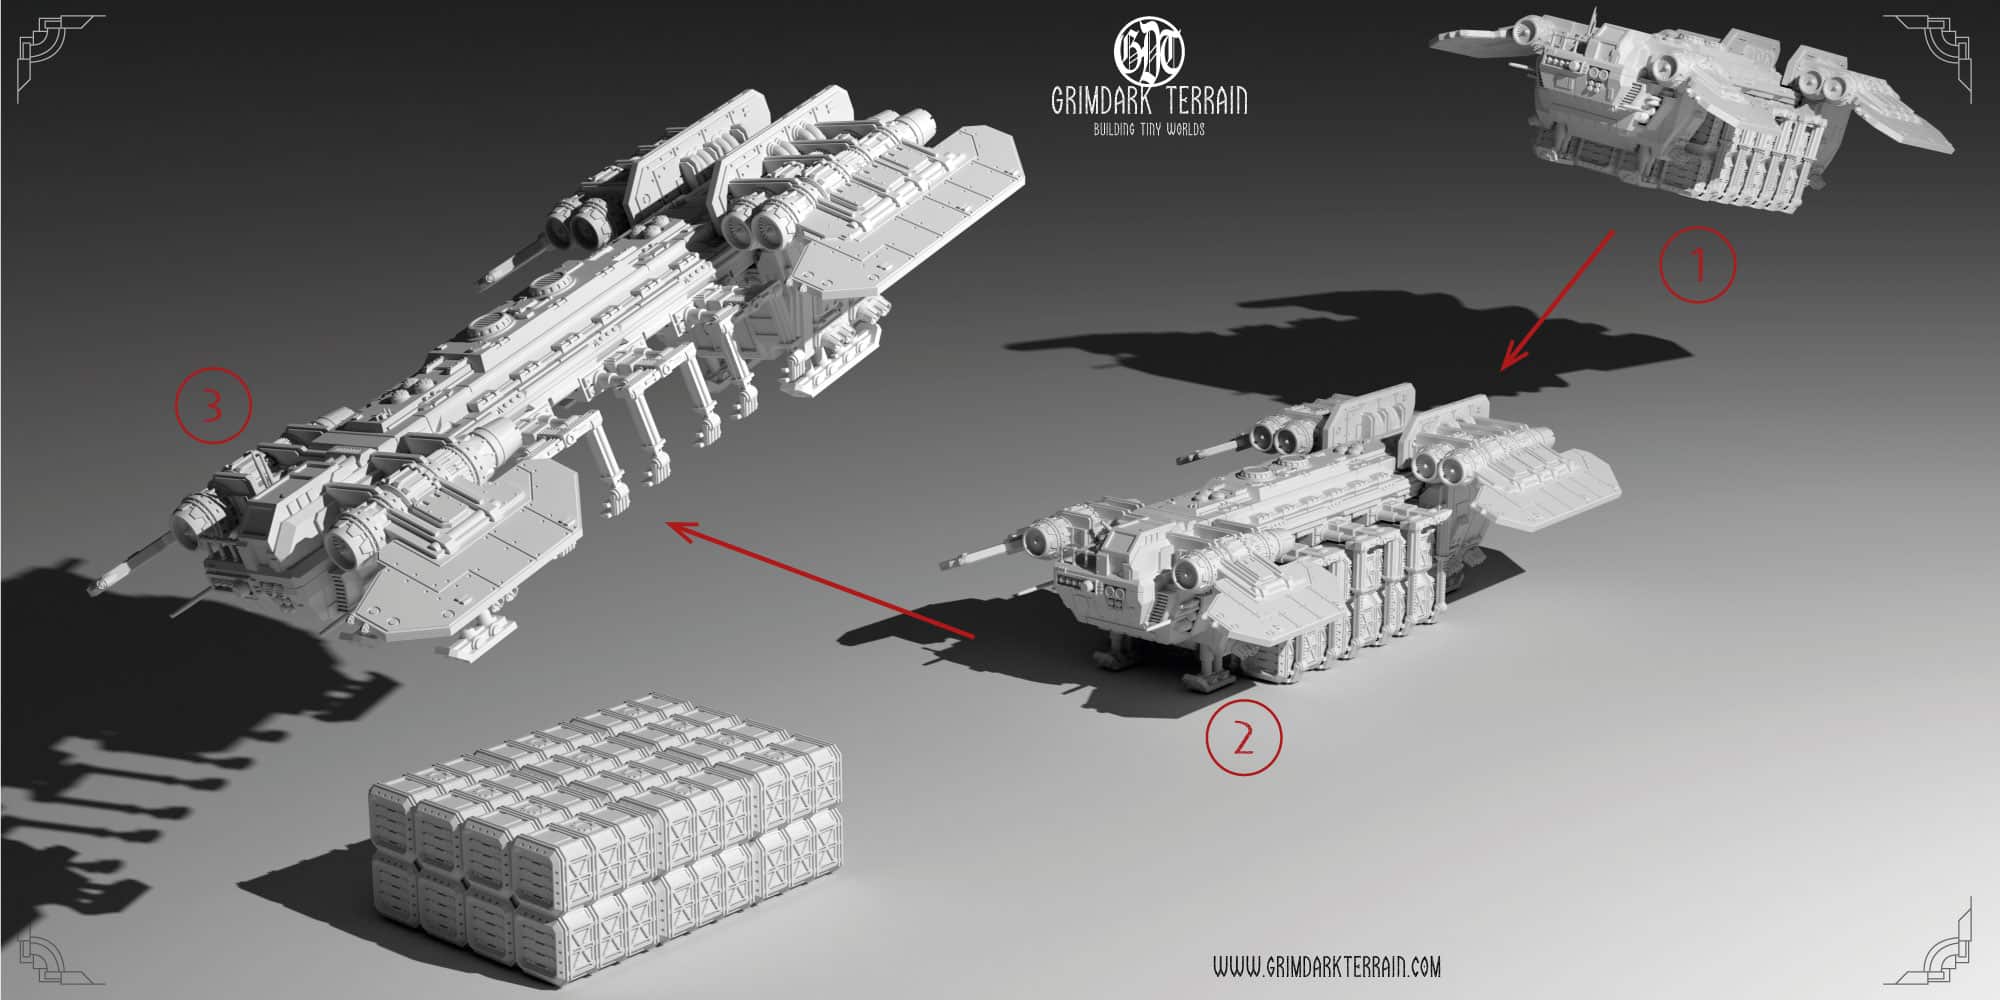
Now we will put together the sub assembliesand then combine those in one last assembly step.
The Bow
For the first step of building the bow, you will need to dry fit the main fuselage part (AE-013) to make sure that the Cargo Bay Wall AE-020 is not in the way. You may need to sand the inside of the cargo bay wall a little to fit to the main bow part.

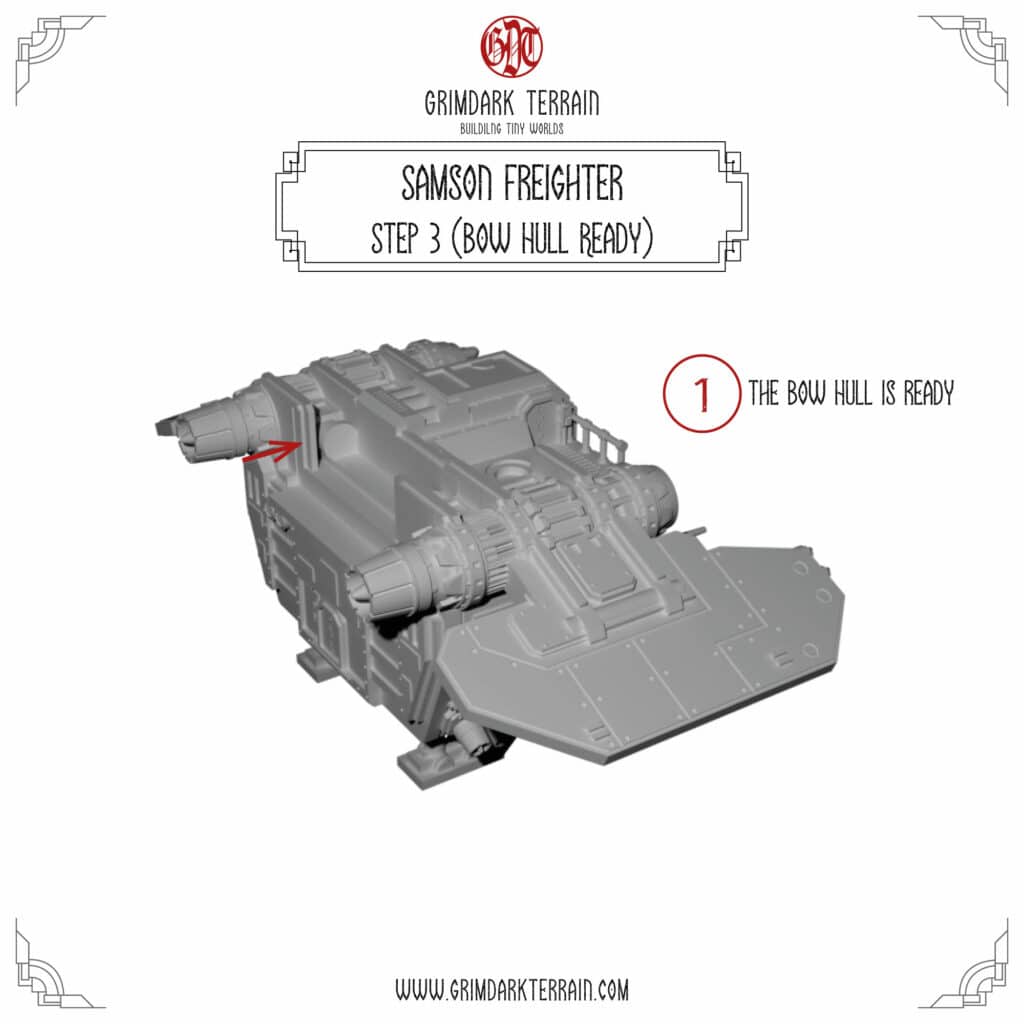
After you have build the bow structure, you will need to add the exhausts and the retro thrusters. Please make sure that you clean the pegs properly for an ideal fit.
Attention: If you have a smaller machine (like a Photon Mono, Photon OG, Photon S, Mars or similar) you will either have to resupport the single bow piece (AE-012) or print the separate parts and fit those together (AE-024, AE-025, print one each)
The Aft
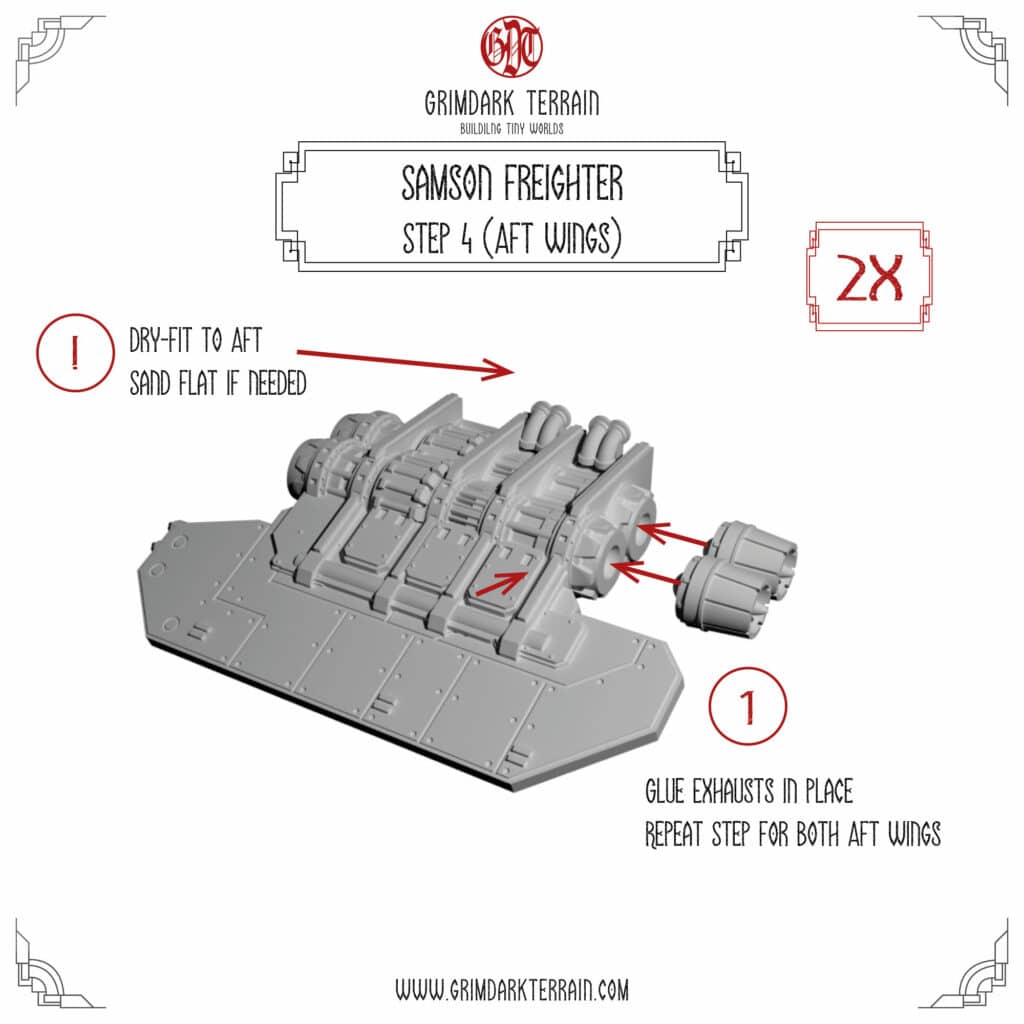
First add the exhausts to both aft wings. Make sure you clean the pegs properly for an ideal fit.
Then take the main aft part (AE-015) and the aft cargo bay wall (AE-021) and dry fit the main fuselage part (AE-013) to make sure that the Cargo Bay Wall AE-021 is not in the way. Sand where necessary and glue in place.
Tip: Often the Aft shows slight convex warping in the center. Sanding that part flat will guarantee a perfect fit.

Add the Aft wings to the Aft Hull. Add Retro thrusters (4x) to the hull.

The Fuselage and Cargo
The fuselage is one single piece. If you want to magentise cargo (absolutely recommended) you will need to slot in 5x2mm magnets in both the cargo bay parts and the fuselage. Depending on the bleed of your printer, you may need to widen the magnet sockets a bit.
Attention: check for polarity BEFORE you glue in the magnets. You want all fuselages of all your Samson Freighters have the same polarity.
Once you have magnetised the fuselage you’re ready for final assembly.


Final assembly
Fit the Bow, the Aft and the Fuselage together. Glue everything in place.