
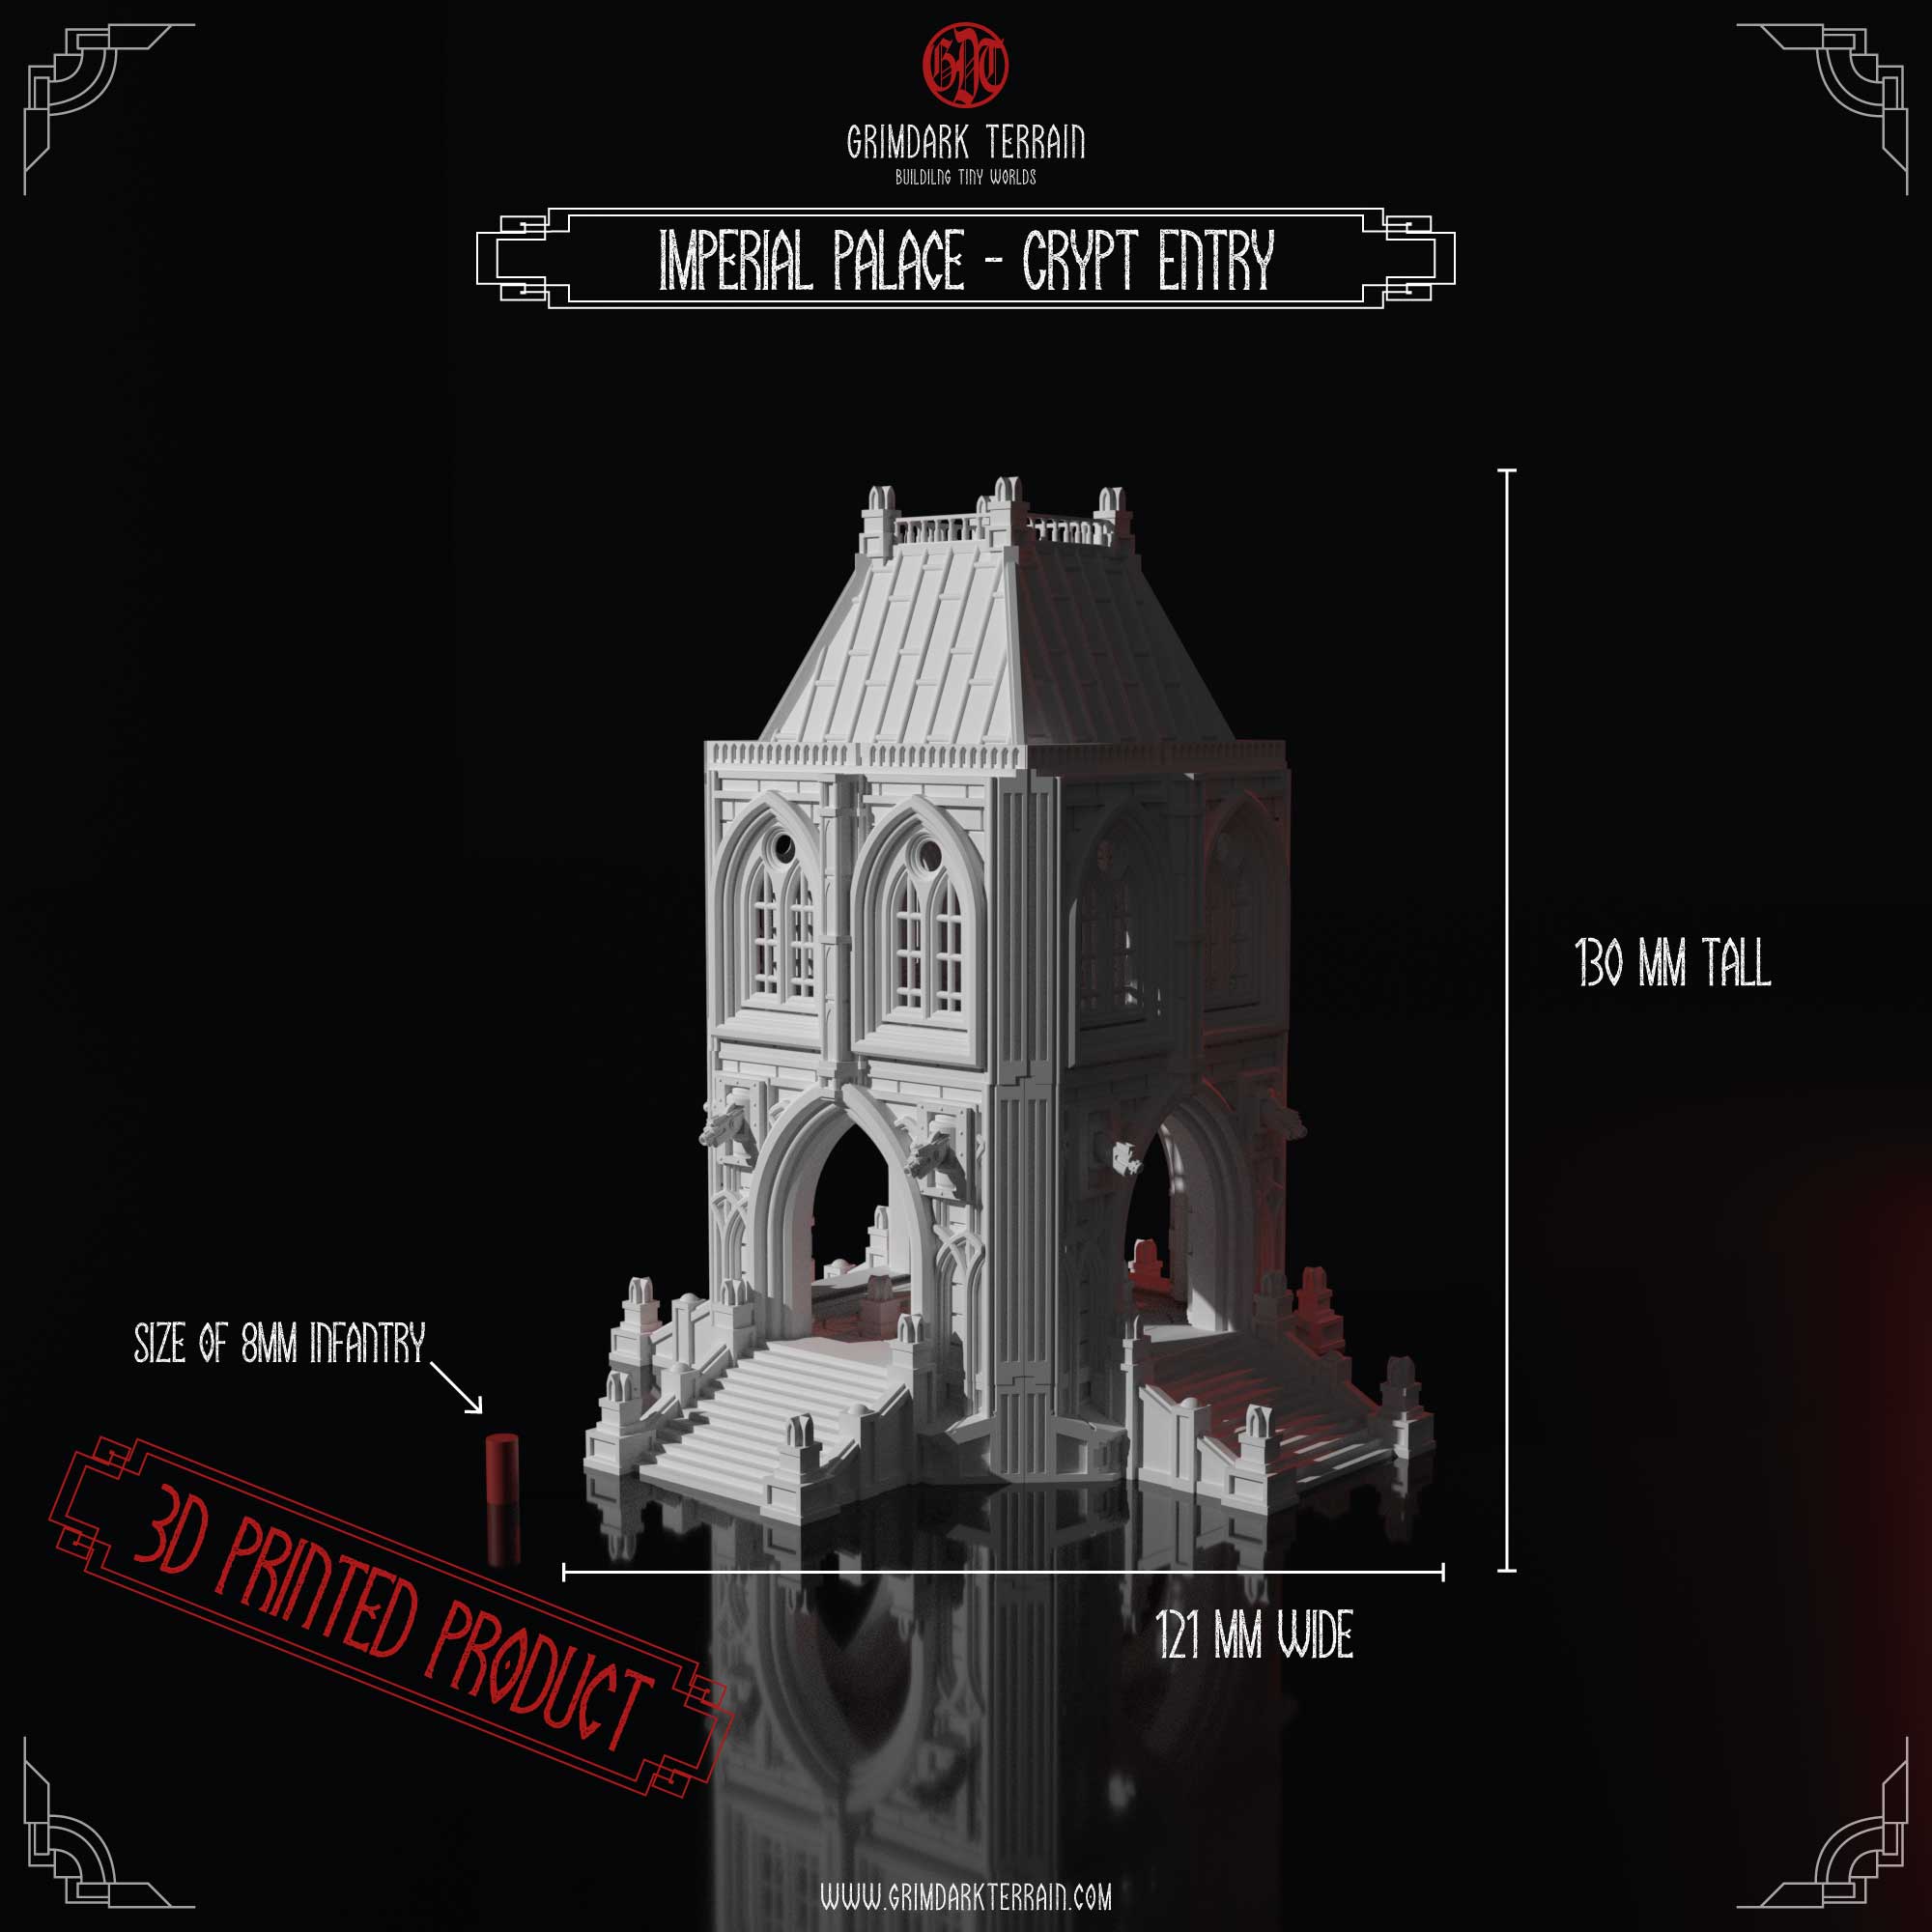
The Crypt Entry
Most Imperial worlds have extensive crypt systems beneath the surface. Over the millennia, a variety of uses have evolved: some crypts are used as shelters, others as places for occult rituals.
Part List
-
- 4 Stairs (4x IP-001 or IP-002)
- 1 Flooring (1x IP-058)
- 4 Wall (4x IP-077)
- 1 Roof (
Here are all parts need from the catalogue:
3D View / AR View
3D View is in lower resolution, because of upload limits of the service provider. The actual model is a lot more detailed. Please use the top right AR button for an immersive experience with your actual models (only works on mobile devices). You can place this building on your gaming table and see how it integrates with your existing terrain. The 3D model is correctly scaled and give a good impression of how it’ll look like, once you printed it.
To show this content you have to accept our cookies.
Step 1 – The Ground Level
Like always, remember to dry fit and maybe sand down the parts before glueing them in place. Check the flooring part for warping and heat and bend straight if necessary. Dryfit all the stairs to the flooring and and glue in place, once you’re happy.
Make sure, the angling is set correctly at 90°.

Step 2 – The Ground Level
Add 4x IP-005 to the result of step 1. The gate parts can be difficult to fit, so be prepared for some additional sanding.
Feel free to give the different sides some variety by adding IP-008 and IP-009 for closed or half open doors. If you leave the doors open, now is a good time to prime and paint the ground level.

Step 3 – The Ground Level
Once all the parts have dried properly, build a corner with 2x IP-077 first and glue them in place. Then hold another piece next to it and slide the roof part IP-042 in. Close off the floor with another wall IP-077.
